Before you begin to get acquainted with HTML you need to know a bit about the structure of HTML elements.
Any element that can be wrapped around something has a beginning tag and an ending tag. The beginning tag will be encapsulated with using “less than” and “greater than "symbols (< >) the ending tag will be encapsulated with the same symbols with the addition of a forward slash (</ >).
This is the body tag, it is the body of the HTML document and all HTML elements which are to be featured on the page are between the beginning and ending of this element.
This is a paragraph tag. All text that you wish to be included in this paragraph go here.
Self Contained HTML Tags
Elements that are self contained end themselves using a forward slash located right before the ending “>” symbol.
Below is a “break” tag. The break tag is used to cause a sentence to go to the next line, or free up some space in your document. The break tag can be used just like the enter key does when typing in a Microsoft Word document.
In the past using <br> used to be acceptable, valid HTML however in recent years you need to end the tag within itself (as seen below with a space and a forward slash).
Example: <br />
Below is a “horizontal rule” tag. This HTML element creates a horizontal line on the page. Since this line cannot be wrapped around any other HTML elements, it is self-contained. Below is an example of a horizontal rule.
Example:<hr />
Chapter 7: CSS Structure
CSS can be a little bit more complicated because there are many CSS declarations that you can make and each declaration has it’s own set of rules.
However, there is a few things that never change when it comes to CSS so I’ll share them with you now so that you can have a better understanding before we start jumping headfirst into the subject.
CSS follows the structure that you see below. CSS is written like this when you declareyour CSS in the head of the document or in a separate document.
Figure 7.1 – Below you can see the structure of CSS stylings.
Some people like to write their CSS directly in the HTML element itself it is known as “inline CSS”. Below is an example.
With inline CSS styles there is no question as to the element being targeted so the targeting as well as the brackets get omitted. However the CSS property, the colon, the CSS property declarations and the ending semi-colon are all there.
Best practice with CSS is to keep all your CSS in a separate document and link the document to your HTML. However, as you can see there are a few different ways to write your CSS. To save time and to avoid confusion we will be just covering how to write your CSS in a separate document.
Inline styles are kind of frowned upon because they can increase load times in web sites and are seen as being amateur-is.
Targeting An HTML Element
In order to begin to write a CSS declaration about any element, you must first tell the CSSdocument which element to target.
Broad Example
If you wanted to target every instance of a particular HTML element you would begin your CSS declaration with the name of that element.
Examples:
- body (Targets the body of the HTML document and all elements contained within)
- h1 (Targets all h1 header elements in the document)
- a (Targets all links)
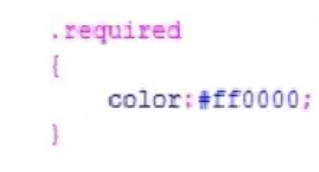
Targeting An Element by “Class”
Another way to target elements is to give them classes. Classes allow you to target elements based not on the type of HTML element but by the classes that you wish to give those elements.
Classes are great because they allow you to style objects with more precision. Below is an example of giving an HTML element a class.
As you can see, in order to give an element a class you must add “class=”, followed by the class name in quotation marks.
In order to target a class, it’s very similar to targeting an HTML element. Except you use the name of the class with a period in front of it.
Below is an example of targeting an HTML element by class.
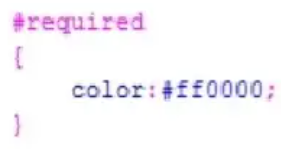
Targeting An Element By ID
Classes are cool because you can have as many elements on a page as you want with the same class.
However, there comes a time when maybe there is only one element on the page which you want to give a bit of significance to.
An ID is a way to target an HTML element. However, there can only be 1 element with the same ID per page.
Sure you can have multiple elements with the same ID on the same HTML page. However, when you go to validate the document it will show as invalid in an HTML validation program, as this is not a valid HTML technique.
To give an HTML element an ID it is very similar to the class declaration.
Nested CSS Targeting
To target elements inside other elements simply declare the elements from biggest to smallest separated by a space. For example to target an image wrapped in a link you would target those elements by using “a img”. Keep in mind you can get as deep as you want with nested CSS targeting.
As long as the element you are targeting is wrapped in the elements you specified your styles will effect the element in question.
Advanced CSS Targeting
With the advent of CSS3 there has become a few more ways to target HTML elements unorder to style them.
For example, in HTML there are a few different elements that all use the same.
If you’re reading this book than chances are you’ve been around the block a few times and seen various things on the internet. One of the most common elements in websites is the web form.
You’ve most likely seen a few web forms in your day because there is always some advertiser or business that wants you to fill out and submit a form.
This brings us to our next question, but how do you style a certain type of “input” element whiteout disrupting other elements which you don’t want to tamper with?
What you see above is a little bit of an advanced CSS declaration. As you can see I’m targeting multiple HTML elements with the same CSS declaration by separating each individual HTML element with a comma.
I’m also targeting two different types of inputs (type=”text” as well as type=”date”) using brackets.
And you may not fully grasp this yet. However, I’m targeting EVERY input with the type equal to “text” EXCEPT ones where the class is “s”. And I’m doing this using“: not(element in question)”.
There are a few other advanced techniques to target HTML elements however, I don’t want to overload you. We’ll just cover some of the basic building blocks to get you going.
CSS Hierarchy
CSS is called Cascading Style Sheets because the rules set for CSS “cascade” down the document into other elements. For example, CSS styles that are lower in the document will over power styles that are higher in the document. A style on line 1 will be overpowered by a style on line 365 that targets the same element for instance. That means if you were to declare the default font-family for the document to be be Arial, then later on in the document you specify Tacoma, than the latter style would take effect.
CSS styles that are more specific in their CSS targeting will over power styles that are more vague in their targeting. For example a CSS style directed at all paragraph tags will be overpowered by a CSS style directed at all paragraph tags with a class or id of your choice.
If you are targeting one HTML object and you give the object two conflicting styles the browser will render the style that is lower in the document. For example if you give all he adding's a margin of 10 pixels and then later say that all headings should have a margin of15 pixels, the browser will render the latter style.
If the HTML object itself has an inline style than in most cases the inline-style will be rendered. An example of an inline style would be as follows:
<img src=”/images/example.jpg” alt=”This is alternative text”
style=”float: left;”
/>
In most cases all of these conflicting styles can be bypassed with a declaration of“!important” before the closing semi-colon of the CSS declaration.


0 تعليقات